Tuesday, July 31, 2012

Spooktacular Offer - Join Stampin' Up! in August!

Until August 31st, 2012...

Join "The Creators" in August and get this Spooktacular, FREE Howl-o-ween Printer’s Tray project kit! This boo-tiful kit contains all the bits and pieces to create a super spooky Halloween decoration.
(kit does not contain ink, but you can add that to your starter kit!)

JOIN NOW (click this link, then click Join Now)

Great reasons to join:
  • $125 of Stampin' Up! product for $99
  • 30% discount off your first order over $150 as a demonstrator with in the first 45 days.
  • Demonstrator Business website FREE for 2 months when you sign up within 2 weeks.
  • Free access to an exclusive Demonstrator community website called Stampin' Connection.
  • All the FREE training you could ever want to learn how to run your own business.
  • Help from me any time you want or need it.
  • No obligation to continue and no penalty for ending your demonstratorship at any time.
  • Free monthly magazine with samples, tutorials, inspiration and business ideas.
  • Great Career plan for those who want to work at a business.  
  • Earn Free Stuff! There is always something going on at Stampin' Up! that allows you to earn something great, like STAMPS!
  • And that's only the beginning...
Let me know if you have any questions!  My downline is 100% long distance now, not by choice but because I have moved 3 times since I've become a demostrator.  I have just started an exclusive Facebook page for "The Creators" (the name of my downline group) where we can ALL share ideas, hints, encouragement and inspiration. When you join, you will be sent an invitation to join the Facebook page. I LOVE The Creators!! They are the BEST.

May God bless you abundantly,
Kelly


Monday, July 30, 2012

Stampin' Up! You're Amazing


And he is!  Our little cousin who is in the hospital received this card from us last week.  He is amazing and is going through such a tough time.
I modified one of our #Convention Make N Take projects into a card for him.  I remember having a conversation about this stamp set with a member of my fabulous downline and we were wondering how we would use this stamp set.  Now that I have it and have played with it a little, its becoming a favorite.  I love the vintage feel of the images.
I don't know if you can see in this poor quality photo or not, but the letters of AMAZING were embossed, cut out by hand and popped up with stampin' dimensionals.  I embossed with clear embossing powder by first inking my stamp with Versamark and then following up with Midnight Muse ink.  The new ink pads lend themselves very well to this technique because they are so "juicey".  If you haven't tried them yet, you're going to love them.  See my offer to receive a free one HERE!

Thanks for stopping by, I'd love to hear from you, and I'd love to be your Stampin' Up! demonstrator if you don't have one yet. 
May God bless you abundantly!
Kelly
Go shopping for your Stampin' Up! supplies 24/7 in my Online Store HERE. 
  • Join my Stampin' Up! group "The Creators".  Click HERE to learn more. HAVE FUN, GET CREATIVE, and MAKE MONEY.
  • Rose Rewards
  • Join me on FACEBOOK to see more projects of mine that don't get posted to my blog.
  • Follow my PINTEREST boards.
If you don't have a new catalog yet, you can buy one here and I'll send one out right away along with a lovely thank you card. Free with a $25 minimum order. 
Stampin' Up! 2012-2013 Catalog $7.00 (no paypal account required to pay via paypal) Shipping via Priority 2-3 day mail.
Stampin' Up! Supplies used:
Stamp Sets:  You're Amazing (#12672 wood, #126722)
Ink: VersaMark®(#102283), Midnight Muse(#126860), Raspberry Ripple (#126859), More Mustard (#126964)
Paper: Very Vanilla (#101650), Crumb Cake (#120953, First Edition Specialty paper (#121878)
Tools: Big Shot (#113439), Apothecary Accents Framelits (#127003), Heat Tool (#129053), Paper Snips(103579), Bone Folder (#102300), SNAIL adhesive® (#104332), Stampin' Dimensionals®(#104430)
Accessories:  Stampin' Emboss Powder® Clear (#109130), Vintage Trinkets (#118764)
Stampin' Up! You're Amazing stamp set images


Stampin' Up! Beautiful Butterflies

Butterflies and flowers on a background of pink! Add some spritz, sparkle and ruffled ribbon and my heart is happy!

The middle portion with the torn edges was a happy accident.  The first card I made, my wheel was upside down, so I tore it out and added it to a new card.
I made a set of these for a friend, but embossed the floral image from the Elements of Style stamp set.
I used the same Very Vintage wheel stamp on the flap of the envelope for a complete coordinating look. So which do you like better?  The embossed version or the stamped on white version?  I think I prefer the embossed version, but the stamped version would be easy to reproduce for a class or card party.
If you click on the photo you can see a larger image and get a good look at the ruffled ribbon.  The new stitched 1/4" grosgrain ribbon has that sweet little white thread that is easy to pull, so you can easily gather your ribbon any time you need a little more dimension or character.
To get that ruffled edge of the paper to stand up, after tearing, run your bone folder perpendicularly to the torn edge until you get the look you like.  Gently press the bone into the edge as you run it along to further distress and create curl.
Finally,  a little spritzing with Rich Razzleberry marker in the Color Spritzer tool and some Shimmer Paint (just a drop or two) mixed with rubbing alcohol ink in our new spritzer bottles add the perfect finishing touch to this feminine vintage card.
This card was really easy to put together, but has really nice texture and dimension.  I hope you've enjoyed it and feel inspired to do some stamping today!
May God bless you abundantly,
Kelly
You can purchase your Stampin' Up! supplies 24/7 in my Online Store HERE.

Stampin' Up! Supplies Used: 
Stamp Sets:  Elements of Syle (#118611 wood, #120045 clear mount), Very Vintage wheel (#117693)
Ink:  Rich Razzleberry (#126950), Rich Razzleberry marker (#120970), VersaMark®(#102283)
Paper: Pink Pirouette (#111351), Rich Razzleberry (#115316), Whisper white (#100730)
Tools:  Big shot (#113439), Beautiful Butterflies Bigz die (#114507), Perfect Polka Dots folder (#117335) Paper Snips(103579), Bone Folder (#102300), SNAIL adhesive® (#104332), Stampin' Dimensionals®(#104430), Color Spritzer Tool (#107066), Stampin' Spritzer (#126185)
Accessories:  Stampin' Emboss Powder® White (#109132), Frost White Shimmer Mist (#116854), 1/4" Stitched Grosgrain Whisper White ribbon (#126877)


If you don't have a new catalog yet, you can buy one here and I'll send one out right away along with a lovely thank you card.
Stampin' Up! 2012-2013 Catalog $7.00 (no paypal account required to pay via paypal) Shipping via Priority 2-3 day mail.

Saturday, July 28, 2012

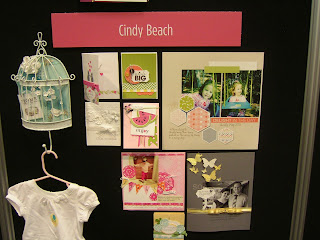
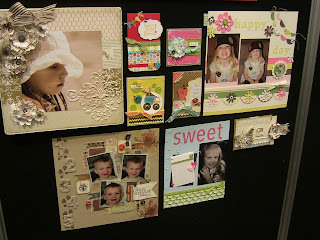
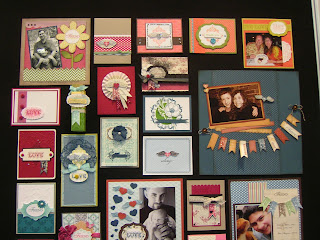
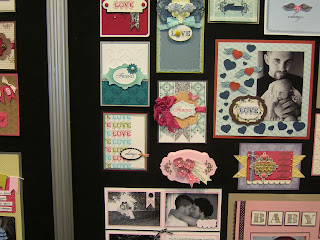
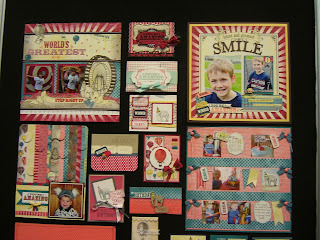
Stampin' Up! Convention 2012 Display Board photos

How about some convention photos? One of the great pleasures of attending a Stampin' Up! event is seeing all the amazing projects created by all our amazing demonstrators and artists. Enjoy!
Stampin' Up! Convention 2012 Display boards

Stampin' Up! Convention 2012 Display boards

Stampin' Up! Convention 2012 Display boards

Stampin' Up! Convention 2012 Display boards

Stampin' Up! Convention 2012 Display boards

Stampin' Up! Convention 2012 Display boards

Stampin' Up! Convention 2012 Display boards

Stampin' Up! Convention 2012 Display boards

Stampin' Up! Convention 2012 Display boards

Stampin' Up! Convention 2012 Display boards

Stampin' Up! Convention 2012 Display boards

Stampin' Up! Convention 2012 Display boards

Stampin' Up! Convention 2012 Display boards

Stampin' Up! Convention 2012 Display boards

Stampin' Up! Convention 2012 Display boards

Stampin' Up! Convention 2012 Display boards

Stampin' Up! Convention 2012 Display boards

Stampin' Up! Convention 2012 Display boards

Stampin' Up! Convention 2012 Display boards

Stampin' Up! Convention 2012 Display boards

You can click on any of the photos to see a larger view. I'm not a very good photographer and my camera is really old and crappy, but I think you can get the idea of how awesome the display boards are.  I wanted to take so many of these projects home with me!  Guess I better get started CASEing!

If you have questions about any of these projects or products, please don't hesitate to ask me! My number one job as a demonstrator is to help others create. And I love doing just that.

May God bless you abundantly,
Kelly


If you don't have a new catalog yet, you can buy one here and I'll send one out right away along with a lovely thank you card.
Stampin' Up! 2012-2013 Catalog $7.00 (no paypal account required to pay via paypal) Shipping via Priority 2-3 day mail.

Friday, July 27, 2012

Make a Cake Pop Up Birthday cake card Stampin' Up!

I missed sending a couple of really important birthday cards this month.  I'm always late, but at least this time they'll be sent in the same month! LOL!
This one is for our dear friend "Sam" who now lives far away from us.  He's 4 this year, so I wanted to make a "FUN" card for him.  I decided to go with a pop up card.


Those little pinwheels on top are so cute, aren't they?  You could do pinwheels on every layer if you wanted to.  I got off easy since Sam is only 4!
Important! Complete the outside cover of the card before you glue the pop up cake insert into the card.  Once the insert is glued, the card is bulky and uneven and difficult to work with.  You'll appreciate this tip, trust me.
(click on the photos to see a larger view) So here's how you do it:
Your card inside should be cut to 8 1/4 by 5 1/4 inches, then folded in half.  With the fold against the top of the trimmer, make 4 cuts.  the first one is shown above.  With the top edge of the card at the 1 1/8" mark on the trimmer and the fold at the top of the trimmer, press the blade down and cut till the pointer in the center of the blade handle reaches the 1 inch mark on the blade guide. Push the blade back up to its starting position to make sure you've cut through both thicknesses.  Do this for each cut you make. Do not remove the card from the trimmer, just continue to move it up  to each new position until all 4 cuts are made.
For the second cut, move the card up to the 1 7/8" mark and cut to the 1 1/2" mark on the blade guide.
For the third cut, move the card up to the 2 7/8" mark and cut to the 2" mark on the blade guide.
For the fourth cut, move the card up to the 3 7/8" mark and cut to the 2 " mark again on the blade guide.

Place the card in your Simply Scored Tool and score from the end of the cut line down to the next cut line as shown in the photo above.
Fold on all the creases and fold the cake parts into the center of the card as shown above.
From the back it should look like this (photo above).
You will need 3 strips of paper to cover your cake layers: 1 x 4", 1 x 3", and 3/4 x 2" (shown above)
Fold and crease each of these strips in half with your bone folder and glue to the cake layers of the card. I don't know why I didn't take a picture of that step.
When you're ready to put the card together, glue the back of the card insert, one side at a time to the card base.
Glue the second side down.  When you glue the second side, fold the card shut to adhere.  You do this to make sure your card will shut when it's finished.
And here's my card front.  CUTE stamp set!!  I recommend you use the Stamp A Ma Jig because I didn't and my cake looks a bit lop-sided.
There is a printable version of this tutorial in my tutorials page.
If you need any of the supplies to make a card like this one, you can find everything you need in my Stampin' Up! Online Store HERE.
I'd love to see your pop up birthday cakes if you make one!  Tomorrow I'll show you the card I made for "Sam's" mommy with a stamp set I got at #Convention 2012.
Til later, and may God bless you abundantly,
Kelly

Stampin' Up! Supplies used:
Stamp Sets: Make a Cake (#126740 wood, #126742 clear mount), Word Play (#120308 wood, #120651 clear mount)
Ink:  Midnight Muse(#126860), Primrose Petals (#126858), Summer Starfruit (#126991)
Paper:  Patio Party Designer series paper (#126916), Whisper white (#100730), Primrose Petals (#126841), Midnight Muse (#126843)
Tools:  Simply Scored (#122334), Paper Trimmer (#126889), Bone Folder (#102300), 1 3/4" Circle punch (#119850), 2 3/8" Scallop Circle punch (#118874), Multipurpose liquid glue (#110755)
Accessories:  no accessories? can you even believe that?

If you don't have a new catalog yet, you can buy one here and I'll send one out right away along with a lovely thank you card.
Stampin' Up! 2012-2013 Catalog $7.00 (no paypal account required to pay via paypal) Shipping via Priority 2-3 day mail.


Thursday, July 26, 2012

Sweet Pressed Cookie Stamps Box and cello Bag Stampin' Up!

As promised, here are a few more details on yesterday's box of Sweet Pressed Cookies box and bag.
The box is actually one of our Make n Takes from #Convention 2012 and those circles that have been stamped on the box in VersaMark® are the centers of the Daydream Medallions stamp set (#126465 wood, 126467 clear mount).
If you'd like to open and close your box without removing the wrapping, you can attach the ribbon as you see I've done in the photo above.
To create the tag, stamp 3 of the smallest medallions from the Daydream Medallion set in Primrose petals ink on Primrose petals card stock. Punch out with the 3/4 inch punch.  This is only to make cutting them out easier.
Then crumple them up and stack using mini glue dots.
Add a large rhinestone to the center.  Punch a tag from silver glimmer paper. IS THIS STUFF NOT THE GREATEST STUFF IN THE WORLD!!!??? THE SPARKLE, OH THE SPARKLE!  (You know you want some NOW...so I'm making it easy on you...click this link to buy it).

Stamp your greeting using Midnight Muse ink on Whisper White then hand cut the flag.  It will not matter if it's straight...it's a flag....blowing in the wind.....You get the idea.  Punch a small hole in the top of your flag and tie it onto your cookie bag. Voila!
If you would like to purchase the supplies used in these cookie packaging ideas, just VISIT MY ONLINE STORE and type in the product numbers listed below in the search bar.  (When you shop in my online store you get preferred prices and discount shipping, you can also qualify to get hostess benefits when you spend $150 or more) You can get everything you see here except the cookies. However, you can get your own cookie stamps that come with this very excellent sugar cookie recipe and make your own.  See yesterday's post for my tips on making stamped cookies.  Your friends and family will love you even more for it!
May God bless you abundantly,
Kelly

Supplies used:  
Stamp sets:  Daydream Medallions (#126465 wood, 126467 clear mount), Teeny Tiny Wishes (#115370 wood, #127802 clear mount)
Ink: Midnight Muse(#126860), VersaMark®(#102283), Primrose Petals (#126858)
Paper:  Whisper white (#100730), Primrose Petals (#126841), Silver Glimmer Paper (#124005)
Tools: Extra-large tag punch (#119866), Paper Snips (#103579)
Accessories:  Primrose Petals stitched ribbon (#126844), 4"x6" Cellophane bags (50 per pkg) (#102757), Kraft Gift boxes (set of 4) (#124106), Rhinestone basic jewels (#119246), Vintage Faceted Designer Buttons (24) (#127555)

If you don't have a new catalog yet, you can buy one here and I'll send one out right away along with a lovely thank you card.
Stampin' Up! 2012-2013 Catalog $7.00 (no paypal account required to pay via paypal) Shipping via Priority 2-3 day mail.


LinkWithin

Related Posts Plugin for WordPress, Blogger...